How to Install Hyper-V on Windows 11/10 Home
It is interesting to note even though Windows 11/10 Home doesn’t have features available right away; they can be enabled using scripts and commands. Some of these commands are available directly with Windows; people don’t know about them. We already know how to enable the Group Policy Editor in Windows 10 Home, and now this script will get you Hyper-V.
Script to Enable Hyper-V
The script has been created by the Microsoft Virtualization team on Github.
Steps to Enable Hyper-V in Windows 11/10 Home
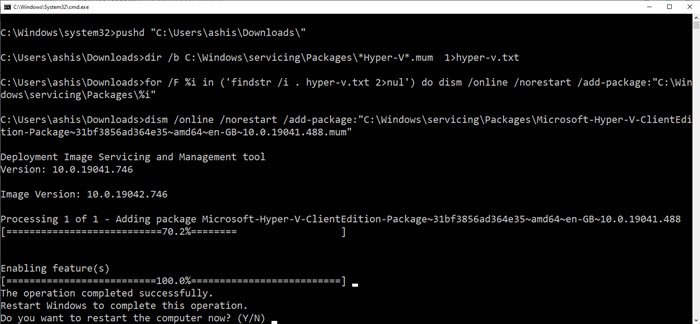
Copy the above-mentioned script file into notepad, and save it as “Enable Hyper-V.bat”. You can save it anywhere, but the Desktop will be quickly accessible.Next, please right-click on the file, and run it with administrator privileges.You should see the command prompt now where the script will be executed.Once done, it will prompt you to restart the computer. Make sure to do that.
The script makes it possible to enable Hyper-V, but to finally have it on Windows, you will have to enable it through Windows 10 Optional Features.
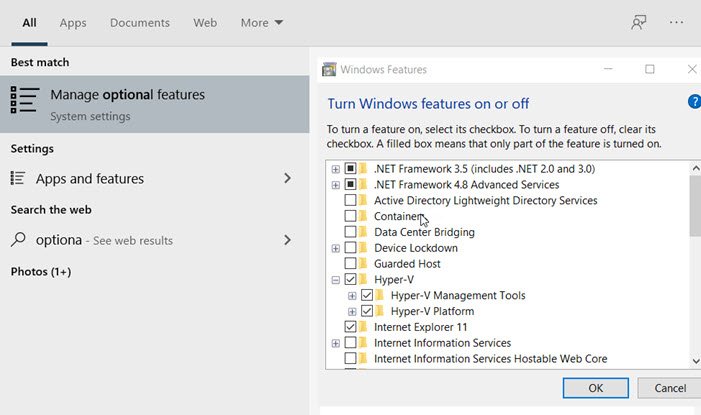
Type optionalfeatures.exe in the Run prompt, and press the Enter key. It will open the Windows Features pop-up window, where you can select and unselect to add or remove features. You can also type Hyper-V, and it will reveal the Windows features box. Once done, locate Hyper-V, and check the box which says Hyper-V management tools and Hyper-V Platform. As you can see, most of the features are available in Windows 11/10 Home version, and they can be enabled using scripts and commands. Even though Microsoft might not recommend it, there is no one to blame about. Do make sure that your computer hardware supports Hyper-V – else this may not work. I hope the post was easy to follow, and you were able to enable Hyper-V in Windows 11/10 Home version. Read next: How to enable Windows Sandbox in Windows 11/10 Home.


