At times, you might have to present a customized spreadsheet for your school project or office report. If so, you can use the Orientation feature in Excel to rotate the text in whatever direction you want. Whether you want to rotate text in one cell or multiple cells – everything is possible with the help of this functionality.
How to rotate text in Excel spreadsheet
To rotate text in an Excel spreadsheet, follow these steps- To know more about these steps, keep reading. To get started, open a spreadsheet in Excel and select a cell with text. After that, make sure you are in the Home tab. If so, click the Orientation option in the Alignment section.
Now choose an orientation setting as per your requirement. It offers these options-
Angle CounterclockwiseAngle ClockwiseVertical TextRotate Text UpRotate Text Down
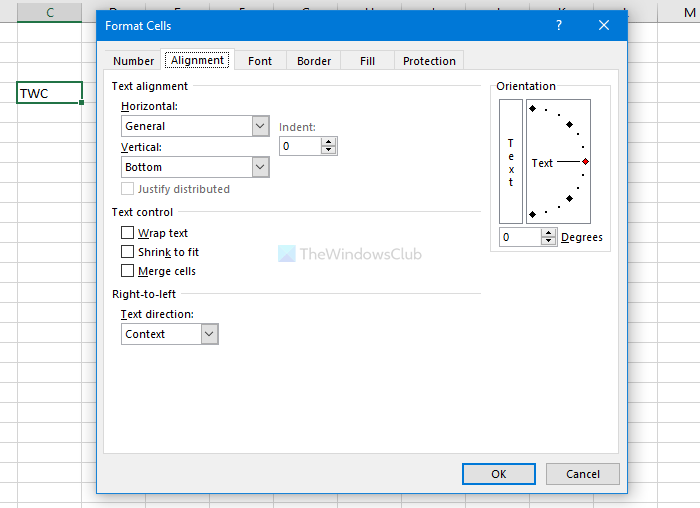
However, if you are not happy with the preset settings or customizations, you can opt for a manual one. For that, select the Format Cell Alignment option. By default, it rotates the text by 45 degrees when you choose Angle Counterclockwise or Angle Clockwise option. However, if you want to change the angle, it is possible to do that from the Format Cell Alignment window. In case you want to make that specific change, click on the corresponding option and enter a new value in the Orientation section.
It is also possible to change the horizontal and vertical alignments, text direction, etc. Let’s assume that you do not like to show the left-aligned text, and instead, you want it to be right-side-aligned. At such a moment, you can expand the Horizontal drop-down list and choose the Right option. Likewise, you can change the vertical alignment as well. Like changing the indent and align bullet points in PowerPoint, you can do the same in Excel. For that, change the Indent value in the Format Cell Alignment window. After changing all these settings, click the OK button to save the change. That’s all!