By the way, there are multiple IP address locator services available on the internet that you can use to find out the IP address. But do you know that an IP address of the system can be identified by only executing a simple command? In this guide, you will learn an easy approach to get the Public IP address, including details about the Internet Service Provider, using PowerShell in Windows 10.
Get Public IP address using PowerShell
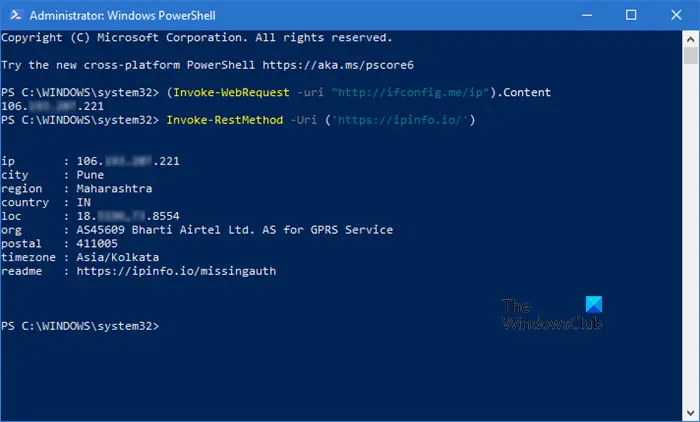
To get the Public IP address using PowerShell in Windows 10 OS, do the following: In the PowerShell Console, type the following command – Press the Enter key to run the command. After completing the above steps, you will get the IP address to your internet service connection.
Get more details about the Internet Service Provider
Along with the Public IP address, you can even get more details about the Internet Service Provider as well. In order to know the way to find it, follow the below steps: In the open PowerShell windows, type the following command – Press the Enter key and it will show all the details like city, region, country, and others. In the above snapshot, you can see all the details corresponding to your internet connection such as city, region, timezone, org, and others. I hope this tutorial would help you to find the IP address with other details as well. If you are still in doubt, you can put down your comments relevant to this article. Related reads: