How to change Screen Resolution in Windows 11
We can check and change Screen Resolution in Windows 11 in two quick and easy ways – via Settings or using PowerShell. We’ll explore this topic under the methods outlined below in this section.
1] Check and change Screen Resolution via Settings app
To check and change Screen Resolution via Settings app in Windows 11, do the following:
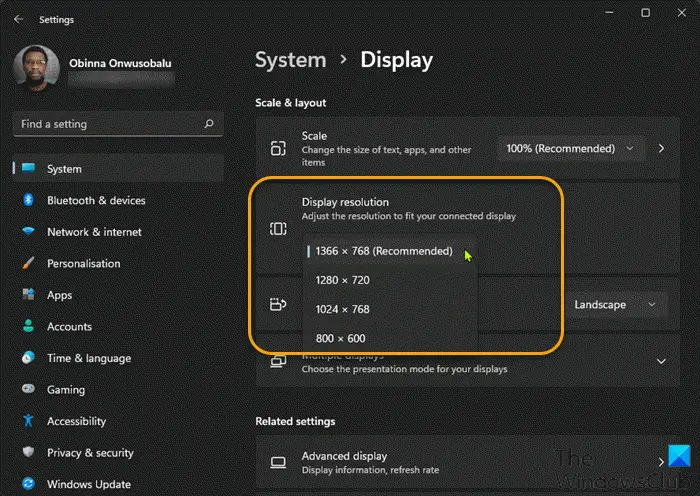
Press Windows key + I to open the Settings app.Select System.On the right side of the System category, click on the Display tab.Scroll down on the right pane and you will see the current display resolution under the Display resolution section. For instance, on my PC, screen resolution is set by Windows 11 is 1366×768 (Recommended) pixels.To change the Screen resolution, click on the drop-down and select what you want.Exit Settings app.
2] Check and change Screen Resolution using PowerShell
To check and change Screen Resolution via Windows Terminal in Windows 11, do the following:
Press Windows key + X to open Power User Menu.Then press I on the keyboard to launch Windows Terminal.In the Windows Terminal console, type in or copy and paste the command below and hit Enter to get/check screen resolution.
Exit Windows Terminal.
This post will show you how to change the Display Resolution using HRC, CMD or this QRes script.
TIP: This post will show you how to create and set Custom Resolution on Windows.
How do I change my screen resolution to 1024×768?
To change your screen resolution to 1024×768 on your Windows PC, you can follow these instructions: Right-click your desktop, and then left-click Properties. Click the Settings tab to view display properties. Click the Advanced button. Click the Monitor tab. Move the slider underneath Screen resolution to 1024×768 or higher, and then click OK. TIP: This post shows how to adjust your Monitor for better screen resolution.
How do I change my screen resolution to 1920×1080?
To change your screen resolution to 1920×1080 in Windows 10, you can follow these instructions: Open Settings app using Win+I hotkey. Access System category. Scroll down to access the Display resolution section available on the right part of the Display page. Use the drop-down menu available for Display resolution to select 1920×1080 resolution. Press the Keep changes button. Related post: How to Change Color Calibration in Windows 11/10
How do I check my screen resolution settings in Windows 11/10?
To check your screen resolution settings in Windows 11/10, you can follow these instructions: Type Display Settings in the search bar from the Start Menu in the lower-left corner of your screen. Click to open. Scroll down to the Scale and Layout section and look for the resolution drop-down box. Make note of the resolution listed.
How do I fix my Display settings?
To fix your display settings on your Windows PC, you can follow these instructions: Right-click anywhere on your desktop, and click “Personalize” to open the Personalization window. Click “Display Settings” at the bottom of the list. Adjust the resolution by clicking, holding, and dragging the slider under “Resolution.” The highest available resolution is the native resolution of your monitor.
Why can’t I change my Screen resolution?
The primary reason for this issue is driver misconfiguration. Sometimes Drivers aren’t compatible, and they choose a lower resolution to stay safe. So let’s first update the Graphics driver or maybe roll back to the previous version. This post will help you if you can’t change Screen Resolution in Windows 11.