Network Printer error 0x00000bcb, Cannot connect to printer
To fix network printer error 0x00000bcb in Windows 11/10, follow these suggestions: To know more about these steps, keep reading.
1] Run Printer troubleshooter
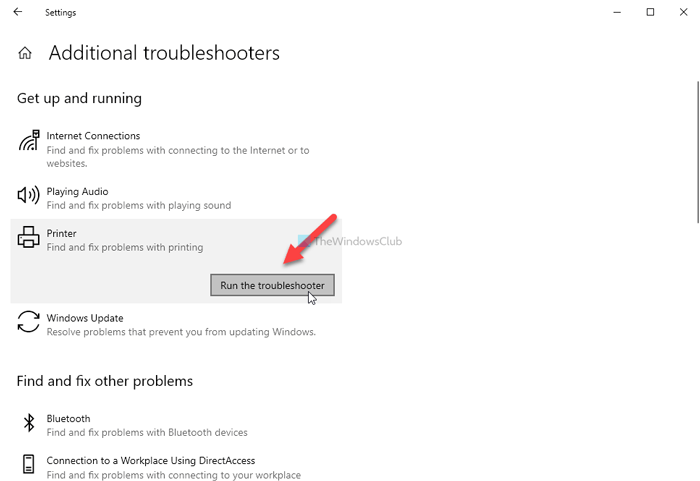
Windows 11/10 comes with numerous in-built troubleshooters to fix common problems like this one. You can find and run troubleshooters in Windows 10 from the Windows Settings panel in case you do not know. Therefore, press Win+I to open the Windows Settings and go to Update & Security > Troubleshoot > Additional troubleshooters. Here you can find the Printer troubleshooter. Select it and click on the Run the troubleshooter button. Then, it shows various options according to the cause of your problem. Follow the on-screen instructions to fix the issue. However, if running the Printer troubleshooter doesn’t solve your network printer issue, there is something more you can follow.
2] Restart Print Spooler
Print Spooler is a background service, which needs to be running to establish the connection between your printer and computer. There could be times when it might stop running due to internal conflicts, causing the issue, as mentioned earlier. If that situation arises, restarting the Print Spooler service would fix the problem. To do that, search for “services” in the Taskbar search box, and click on the individual result to open Services on your computer. Following that, search for Print Spooler service and double-click on it. If the Service status is showing as Running, click the Stop button and restart it by clicking the Start button. However, if it is already disabled, clicking the Start button would do the job. Next, click the OK button, restart your computer, and check if the problem still remains or not.
3] Check printer drivers
Every manufacturer provides drivers to build the connection between your system and the printer – whether you use it as an offline or network printer. If you have fresh Windows 10 installation, you should install the drivers as given with the printer. In case you cannot find the driver media, you can download it from the official website of your printer manufacturer.
4] Add a local printer
Adding your printer locally might fix the issue when your system is not detecting it automatically. To do so, you can take the Devices and Printers panel’s help, which stores all the connected devices’ information. To open this window, open Control Panel and click on the Devices and Printers option. In case you cannot find this option, make sure the View is set as Large icons. Once the Devices and Printers window is opened, click the Add a printer option visible in the top menu bar.
It opens up a window and searches for available printers. Don’t wait for the completion and instead click on The printer that I want isn’t listed option.
Next, choose the Add a local printer or network printer with manual settings option and click the Next button.
Now, choose the Create a new port option > select Local Port, and click the Next button. Enter your port name and click the OK button. Next, it asks you to install the printer drivers. Do it, and click the Next button.
Once done, you will be able to use your printer without any problem.
5] Change LAN Manager authentication level
There are two ways to change the LAN Manager authentication level on a Windows 10 computer – using the Local Group Policy Editor and the Registry Editor. If you are using Windows 10 Home Edition, you must follow the REGEDIT method, as GPEDIT is not available on your PC.
Using Local Group Policy Editor:
At first, press Win+R, type gpedit.msc, and hit the Enter button to open the Local Group Policy Editor. Then, navigate to the following path- Here you can find a policy called Network security: LAN Manager authentication level. Double-click on it and select Send LM & NTLM – use NTLMv2 session security if negotiated option.
Click the OK button, restart your computer, and check if it solves the issue or not. Read: Windows cannot connect to the printer error 0x0000011b
Using Registry Editor:
Press Win+R, type regedit, press the Enter button, select the Yes button to open Registry Editor on your computer. After that, navigate to the following path- Right-click on Lsa > New > DWORD (32-bit) Value, and name it as LmCompatibilityLevel.
Double-click on it to set the Value data as 1.
Click the OK button to save the change. After that, close the Registry Editor, and restart your computer. That’s all! Hope these solutions helped you to fix network printer error 0x00000bcb on Windows 11/10.